In earlier version of SharePoint to develop a state machine workflow using visual studio which was a complex task, but now this is been simplified with the launch of new version of Share Point 2013 which has support for developing similar kind of state machine workflow using Share Point Designer 2013.
To develop a state machineworkflow using visual studio you need to familiar with visual studio and hands on coding, but Microsoft has made this easier in SharePoint Designer 2013.
This white paper will explain how the Workflows experience is simplified and how you can now handle “State Machine Workflow” in SharePoint 2013 using SharePoint designer 2013.
The Workflow in SharePoint Designer 2013 is improved, stable, and scalable. This is not the same old Workflow engine. SharePoint 2013 Workflows run on the Azure Workflow engine, which can be installed on a separate server from SharePoint. Besides the new engine and architectural changes, there are a lot of enhancements to the Workflow design interface and experience.
There is a new visual designer for Workflows, which is similar to what you have seen in some of the Third-party Workflow Tools. In 2010, you could create a workflow in Visio and then import it into SharePoint Designer, but now this functionality is much improved! You can still do the old import/export thing, but now there is also a visual designer that lets you design the Workflows by dragging shapes onto the surface right inside SharePoint Designer. You can toggle between this new Visual Designer, and the old familiar Text-Based Designer. Visio has to be installed on the same computer on which you are creating workflows with SharePoint Designer 2013.
State Machine Workflows:
State machines are groups of ‘normal’ (called sequential) workflows. These workflows are called states in state machine terminology. At the end of each of these state workflows, the workflow jumps into another state as determined by the logic of the completed state. The cool factor here is the ability of state machines to adapt to changing conditions.
In a sequential workflow, everything in the workflow happens in a rather one-way direction, from start to finish. You can have simple branching, but there’s no way to go back to a previous step, for example if you require a second approval in an approval workflow.
State machines allow you do jump between these states, for example between “Get approval” and “Implement suggestions” states, as many times as are required. Not just that, but you can also jump between any states of the state machine, for example if your business logic requires multiple levels of approval.
Stages in SharePoint Designer 2013
SharePoint Designer 2013 has introduced the concept of stages. These are containers in the workflow that allow you to structure the workflow to flow from one stage to another. The use of stages means that you can create a workflow very similar to a state machine workflow (which is why we don’t have state machine workflows in 2013, per se). A stage can be added to a workflow by clicking on the Stage icon in the ribbon (under the Insert section):

This displays a box on the design canvas, which allows you to add workflow actions for that stage. All actions in the workflow must be contained in a stage (there are a few conditions that can reside outside of a stage).

A stage can hold one or more workflow actions, and will also have only one Transition to stage area. The Transition to stage area defines how the workflow exits the stage after its actions have been processed. The stage can be configured to transition to another stage, or to end the workflow. All workflows must have at least one stage, and it is not possible to nest stages in a workflow.
Support for stages is a highly requested feature that allows you to simplify complex workflows. Each stage contains all of the actions that make up that logical section of the workflow. Simple workflows might be only a single stage, while complex workflows could have many stages. Within stages, "step" containers allow you to further organize actions. While all actions must be within a stage, decision shapes can determine the flow both within and between stages.
Below shown example of creating declarative authoring workflow in both SharePoint Designer 2013 and Visual Studio. Workflow authoring is declarative only in SharePoint2013 Workflow. It simplified the way workflows are created and also provides a consistent experience for creating workflow in SharePoint designer and Visual Studio. Workflows are no longer compiled into managed assemblies and deployed to an assembly cache. Instead, XAML files define your workflows and frame their execution. You can see screenshot below on how you create the same workflow in Visual Studio and SharePoint Designer.
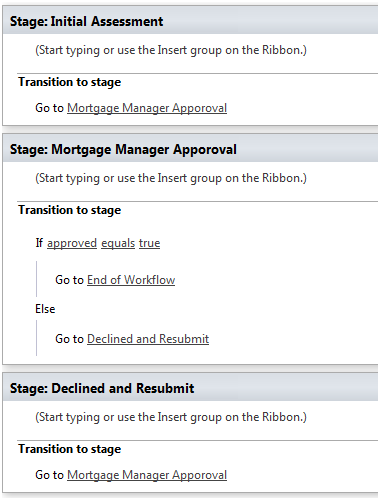
SPD 2013 Declarative workflow Authoring

Visual Studio Declarative workflow Authoring
Loops
One of the major limitations in SharePoint Designer-based workflows in SharePoint 2010 was the inability to loop in workflows. 2013 workflows in SharePoint Designer can now include looping. There are two types of looping available: Loop n Times and Loop with Condition.
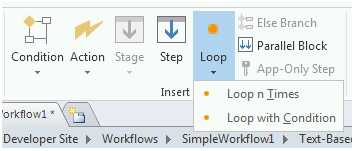
The Loop n Times loop type allows a designer to create a looping condition where the actions contained in the loop container are executed a number of times. One or more workflow actions can be placed in the loop and the workflow will execute these actions (in order) for the number of loop iterations specified.

The Loop with Condition loop type allows a designer to create a looping condition where the actions contained in the loop container are executed until a specified condition is met. Just like the Loop n Times loop type, the workflow actions placed in the loop will execute in order, and the loop will continue to execute these actions until the loop condition is met.

There are some restrictions when using loops:
- Loops must be contained within a stage
- You cannot add a stage inside a loop
- Loops can only have one entry and one exit point
Nested loops are also supported if the need for executing a series of actions in an inner loop is desired.
New Actions in SharePoint Designer 2013
There are a few new actions in SharePoint Designer 2013 that can be used when designing workflows.
Assign a Task
This action creates a 2013 task in SharePoint and assigns it to a single user. Select the Assign a Task menu selection under the Action button from the ribbon to add this action to a stage in a workflow.
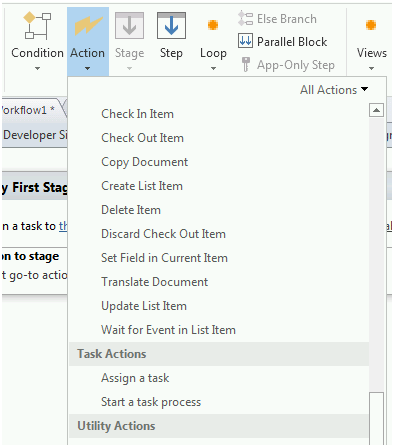
Adding this action to a workflow allows a designer to create a single task, assign it to a specific user, and save the Outcome and TaskID values to workflow variables.

Clicking on the this user hyperlink in the action will display a dialog that allows selection of the task participant, along with other details.
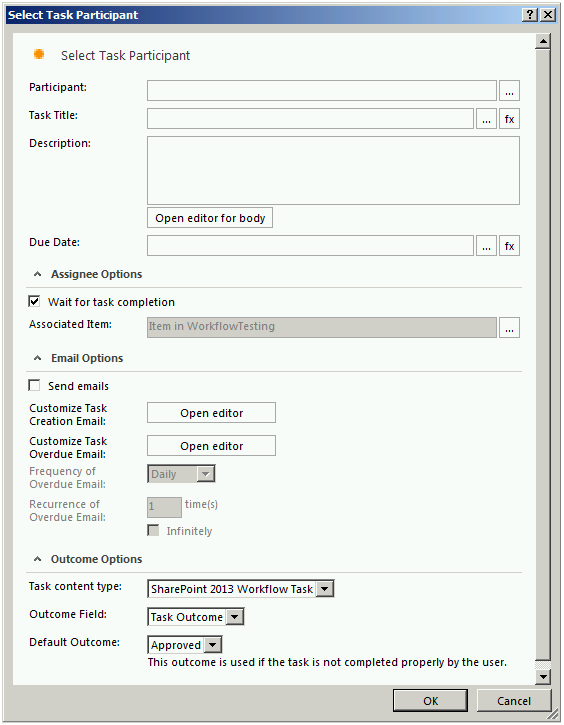
Start a Task Process
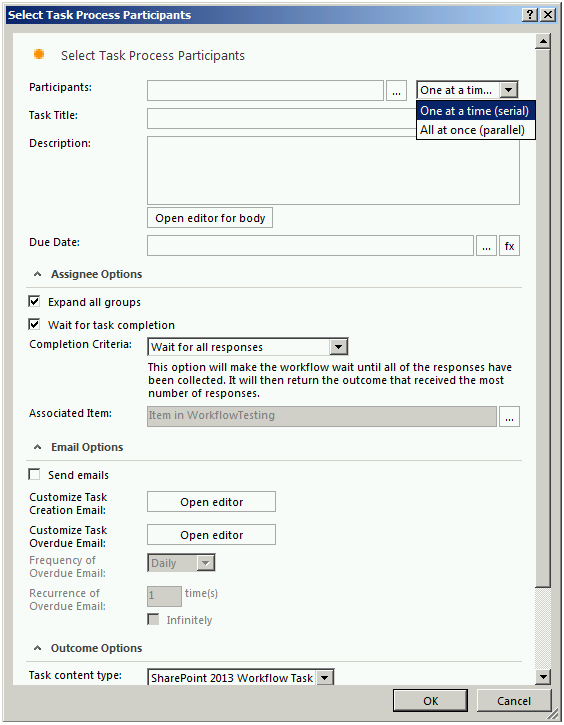
This action is identical to the Assign a Task action, with the difference being that multiple participants can be assigned to the task being created. The participants can be assigned to the task one at a time (serial, meaning the first participant must respond to the task before the next participant is assigned,etc.), or all participants can be assigned to the task at the same time (parallel).
Call HTTP Web Service
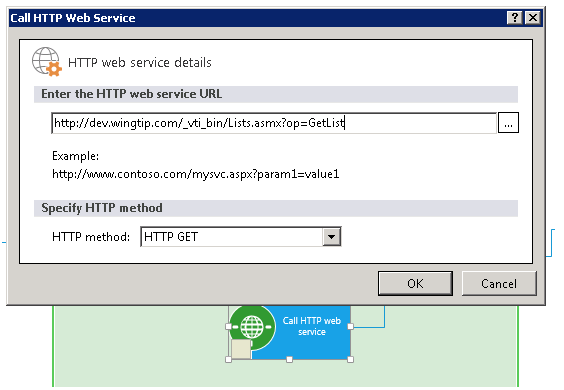
This action allows you to call a REST-based web service without writing custom code. You specify the URL to the web service you wish to call, along with the HTTP method (GET, PUT, POST, DELETE).
Conclusion
SharePoint Designer 2013 has simplified our life for creating powerful workflows without writing complex coding.